
I have made games using various versions of cocos2d, but I wanted to take a look at how Apple’s SpriteKit game framework works. In this tutorial I will take you through a simple memory game I made to test out SpriteKit. Our game will contain a grid of 9 colored circles. The circles will light up randomly in a sequence, then let the player repeat the sequence. The game will then add on to the sequence each time the player successfully repeats it. This will go on until the player messes up the sequence and the game is over. Simple right? Let’s get started!
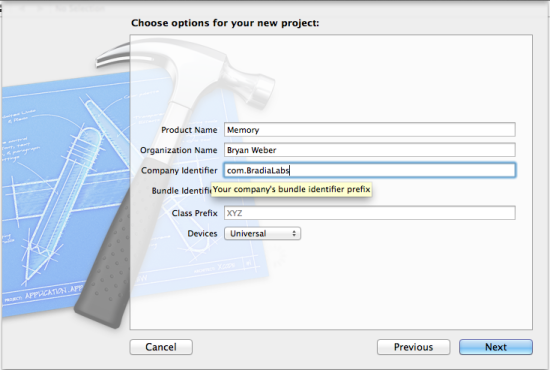
Create a new SpriteKit application.
![]()
And call it Memory (creative, I know…)
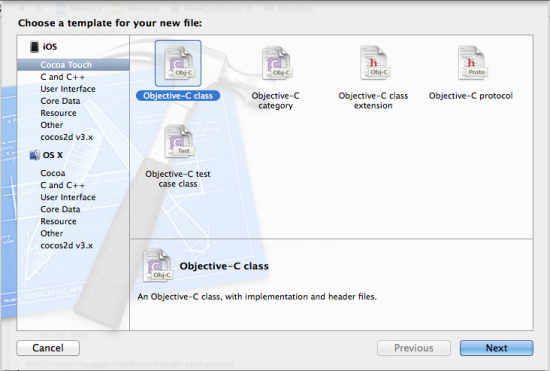
Start by adding a new Objective-C class that is a subclass of SKShapeNode.
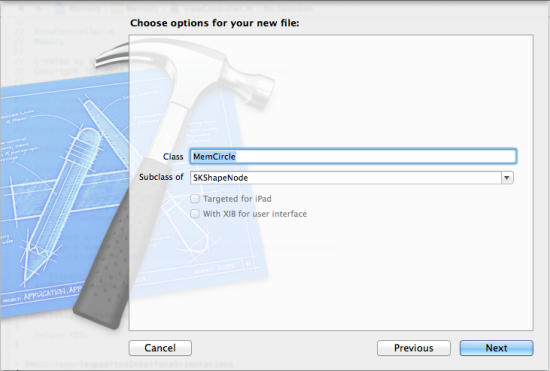
We will use this new class to create colored circles. The colored circles will be used in a grid as the game board. Let’s define the interface for our new class in MemCircle.h
#import <SpriteKit/SpriteKit.h>;

@interface MemCircle : SKShapeNode

@property (nonatomic) int positionBitMask;

-(id)initWithPosition:(int)position inSize:(CGSize)size;

@end
There is a postitionBitMask property that will contain a unique identifier for each instance of the MemCircle class. Now define the initialization function used when declaring a new MemCircle. Now we’ll go through the implementation of our new class.
#import "MemCircle.h"

@implementation MemCircle

@synthesize positionBitMask;

-(id)initWithPosition:(int)position inSize:(CGSize)size
{
    if((self = [super init]))
    {
        float red = (arc4random_uniform(60) + 40)/100.0;
        float green = (arc4random_uniform(60) + 40)/100.0;
        float blue = (arc4random_uniform(60) + 40)/100.0;
        CGMutablePathRef newPath = CGPathCreateMutable();
        CGPathAddArc(newPath, NULL, 0, 0, size.width*0.10, 0, M_PI*2, YES);
        self.path = newPath;
        self.lineWidth = 0.05;
        self.fillColor = [SKColor colorWithRed:red green:green blue:blue alpha:1.0];
        self.strokeColor = [SKColor colorWithRed:red green:green blue:blue alpha:1.0];
        self.glowWidth = 0.0;

        self.name = @"button";
        self.positionBitMask = 1 << position;
    }

    return self;
}

@end
This is a pretty simple class, but we will go over what is going on. First we synthesized our positionBitMask property so we can use it in the class. Next we implemented the initialization function which passes the location of the circle and the size of the board our circles will go on. Our circles should be created with a random color, so we get a random number for the red, green, and blue values. The arc4random_uniform function will return a random number between 1 and the maximum value passed to it. So in our case it will return a number between 1 and 60. We then add 40 to this number so we will end up with a number between 40 and 100. Then we divide it by 100 to get a float value between .40 and 1.0. We pass these values into the fill and stroke colors which will give us a random bright pastel color each time we create a new MemCircle. Since we want to create a circle we make a new path with a radius of 10% of the width of the board it will be placed on and arc length of 2 pi to make a complete circle. We assign this path to our MemCircle class, give it a line width, some color, and a little glow. The node name will be “button”. The next line is a little different. We take the number one and bit shift it by the position that was passed into the initialization function. This will give us a bit mask for each MemCircle at each different position. If we pass the position 0 then the bit will not be shifted left and the integer value will just be 1. If we pass a position of 1 then the bit will be shifted left by one spot and the integer value will be 2. If we pass a position of 2 then the bit will be shifted left twice giving an integer value of 4, and so on. I will show you how we will use this to identify each individual MemCircle in just a bit.
It is time add our new MemCircle to the screen. The project was created with a default scene in the file MyScene.h and MyScene.m. We need to replace the default code with our own code. Start with the header and replace the code with the following.
#import <SpriteKit/SpriteKit.h>

@interface MyScene : SKScene

@property (nonatomic, strong) NSMutableArray *sequence;
@property (nonatomic) BOOL userTurn;
@property (nonatomic) int userSeqStep;
@property (nonatomic) BOOL gameOver;

@end
We’ve added some new properties to the scene. We will use a mutable array to store the memory sequence. The array will just store the MemCircle location bit mask value for each entry of the sequence. The userTurn bool will be used to determine if the user’s input will be accepted or not. We want to ignore the user while we are showing them the sequence. The userSeqStep value will keep track of where the user is in the sequence so we can line up the MemCircle they are pressing with the one we are expecting them to press for the current position in the sequence. Last we have the gameOver value, which will obviously let us know if the game is over.
Next open up the implementation file MyScene.m. Go ahead and add a line to import the MemCircle.h file and just after that, but before the @implementation we’ll define a private interface of functions we will use within the class.
#import "MemCircle.h"

@interface MyScene(Private)
-(void)continueSequence;
-(void)nextInSequence:(NSInteger)seqNum;
@end
We will implement these functions later on. After the @implementation line synthesize all of the properties from the header.
@synthesize sequence, userTurn, userSeqStep, gameOver;
Now let’s replace the default implementation of the initWithSize function. Replace it with this and we’ll go through what it is doing.
-(id)initWithSize:(CGSize)size {
    if (self = [super initWithSize:size]) {
        /* Setup your scene here */

        self.backgroundColor = [SKColor colorWithRed:1.0 green:1.0 blue:1.0 alpha:1.0];

        for (int i = 0; i < 9; i++) {

            MemCircle *button = [[MemCircle alloc] initWithPosition:i inSize:size];

            if(i < 3)
            {
                button.position = CGPointMake(((size.width)*.90*((i+1.0)/3.0)-button.frame.size.width/2),
                                              ((size.height*.80)/3)-button.frame.size.height/2);
            }
            else if (i < 6)
            {
                button.position = CGPointMake(((size.width)*.90*((i-2.0)/3.0)-button.frame.size.width/2),
                                              ((size.height*.80)*(2.0/3.0))-button.frame.size.height/2);
            }
            else
            {
                button.position = CGPointMake(((size.width)*.90*((i-5.0)/3.0)-button.frame.size.width/2),
                                              ((size.height*.80))-button.frame.size.height/2);
            }

            NSLog(@"Adding button at: (%f,%f)", button.position.x, button.position.y);

            [self addChild:button];

        }

        SKLabelNode *score = [SKLabelNode labelNodeWithFontNamed:@"Marker Felt"];
        [score setFontSize:self.frame.size.width*0.10];
        score.text = @"0";
        score.position = CGPointMake(self.frame.size.width/2, self.frame.size.height*0.90);
        score.fontColor = [SKColor colorWithRed:0.23 green:0.56 blue:0.79 alpha:1.0];
        score.name = @"scoreLabel";
        [self addChild:score];

        sequence = [NSMutableArray array];
        userTurn = NO;
        userSeqStep = 0;
        gameOver = NO;

    }
    return self;
}
First initialize the super SKScene class into our class. Next set the background color to white because white is all the rage in UI design these days. Next setup a loop that will iterate 9 times. We’ll use this to place our 9 MemCircle instances in the scene. Each time through allocate a new MemCircle instance using the loop iteration number as the location that way each MemCircle will be uniquely identified. Setup the circles in rows of three, so check to see which row is being processed based off of the iteration number. Each row is separated by the if-else statements in the loop. Each row will be placed at 1⁄3 intervals of 80% of the total height of the screen. Since the origin of the MemCircles is in the center we also need to subtract half of its radius to make it centered on its respective third of the screen. For each column in a row the circles will be placed at 1⁄3 intervals of 90% of the screen width. Again remember to subtract the radius, or half the width of the circle, in order to center the circle on its respective third. For debugging purposes I put a logging statement in to see exactly where each circle is being placed. Then make sure to actually add the MemCircle to the scene using the addChild function. Next add the score label to game board. After initializing the game board with all of the MemCircle objects finish up the initialization by initializing the sequence array, setting the userTurn to no, the user’s place in the sequence to 0, and gameOver to no. At this point our game is initialized, but won’t actually do anything.
I want to show how easy it is to add standard UIKit elements to a SpriteKit game, so I will make our Start button a UIButton object. In order to add UIKit objects you have to wait until the view has been loaded. I implemented the standard didMoveToView function to accomplish this.
-(void) didMoveToView:(SKView *)view
{
    UIButton *startBtn = [UIButton buttonWithType:UIButtonTypeRoundedRect];
    [startBtn setTitle:@"Start!" forState:UIControlStateNormal];
    [startBtn setTitle:@"Start!" forState:UIControlStateSelected];
    [[startBtn titleLabel] setFont:[UIFont fontWithName:@"Marker Felt" size:[view frame].size.width*0.05]];
    [startBtn setFrame:CGRectMake([view frame].size.width*0.05, [view frame].size.height*0.05,
                                  [view frame].size.width*0.25, [view frame].size.height*0.10)];
    [startBtn addTarget:self action:@selector(startBtnPress:) forControlEvents:UIControlEventTouchUpInside];
    [startBtn setBackgroundColor:[UIColor whiteColor]];
    [[startBtn titleLabel] setTextColor:[UIColor colorWithRed:0.23 green:0.56 blue:0.79 alpha:1.0]];

    [view insertSubview:startBtn atIndex:[[view subviews] count]];
    NSLog(@"Adding Button at (%f, %f)", startBtn.frame.origin.x, startBtn.frame.origin.y);
}
This is standard UIKit stuff here. Create a new button and setup its states. I made the frame for the button dynamic as well as the font size so that it would adjust to the different screen sizes that iOS runs on these days. Add an action target for when the button is pressed and insert it as a subview of the game scene’s view. It is that easy to add UIKit objects to your game scene. Next implement the function for the button press action.
-(void)startBtnPress:(id)sender
{
    UIButton *startBtn = (UIButton*)sender;
    [startBtn removeFromSuperview];

    SKAction *wait = [SKAction waitForDuration:2.0];
    [self runAction:wait completion:^(void){
        [self continueSequence];
    }];
}
This is a very simple function. When the start button is pressed it will wait 2 seconds then start running the sequence that the user needs to remember and mimic. We will get into the details of how all that works very soon. I used an SKAction to accomplish the wait functionality. Simply declare an SKAction with the waitForDuration initializer. It takes a float for the number of seconds to wait. The run the action at the scene level and put some code in the completion block to be run when its done. In this case I run the continueSequence function to progress the sequence and play it back for the player.
The player won’t be able to do much with our game if we don’t give them a way to interact with it. We need to implement some touch detection to find out which MemCircles the player is pressing. To do this simply implement the standard touchesBegan and touchesEnded functions.
-(void)touchesBegan:(NSSet *)touches withEvent:(UIEvent *)event {
    /* Called when a touch begins */

    for (UITouch *touch in touches) {
        //CGPoint location = [touch locationInNode:self];
        NSArray *nodes = [self nodesAtPoint:[touch locationInNode:self]];
        for(SKNode *node in nodes)
        {
            if([node.name isEqualToString:@"button"])
            {
                MemCircle *touchedCircle = (MemCircle*)node;
                touchedCircle.glowWidth = touchedCircle.frame.size.width/4;
            }
        }
    }
}
When the player touches the screen we need to check to see if it was on one of the MemCircles. Loop through each touch in the touches that were passed to the function. Find any SKNodes at the point of the touch. If the the node’s name is “button” then the player touched one of the MemCircles. Cast the node to a MemCircle and set the glowWidth to a quarter of the size of the circle itself. This will give the player some feedback that they have touched the circle.
Let’s look at what happens when the user lifts their finger off the screen.
-(void)touchesEnded:(NSSet *)touches withEvent:(UIEvent *)event
{
    int touchesMask = 0;
    for (UITouch *touch in touches) {
        NSArray *nodes = [self nodesAtPoint:[touch locationInNode:self]];
        for(SKNode *node in nodes)
        {
            if([node.name isEqualToString:@"button"])
            {
                MemCircle *touchedCircle = (MemCircle*)node;
                touchedCircle.glowWidth = 0.0;
                touchesMask = touchesMask | touchedCircle.positionBitMask;
            }
        }
    }

    if(userTurn == YES && gameOver != YES)
    {
        if(userSeqStep < [sequence count])
        {
            NSNumber *nextNum = [sequence objectAtIndex:userSeqStep];
            int nextIntMask = [nextNum intValue];
            if(touchesMask != nextIntMask)
            {
                gameOver = YES;
                SKLabelNode *lose = [SKLabelNode labelNodeWithFontNamed:@"Marker Felt"];
                [lose setFontSize:self.frame.size.width*0.15];
                lose.text = @"You Lose!";
                lose.position = CGPointMake(self.frame.size.width/2, self.frame.size.height/2);
                lose.fontColor = [SKColor colorWithRed:0.23 green:0.56 blue:0.79 alpha:1.0];
                lose.name = @"loseLabel";
                [self addChild:lose];

                return;
            }
            if(userSeqStep == [sequence count] - 1)
            {
                //update the score
                SKLabelNode *scoreNode = (SKLabelNode*)[self childNodeWithName:@"scoreLabel"];
                [scoreNode setText:[NSString stringWithFormat:@"%i", [sequence count]]];

                //continue the sequence
                [self continueSequence];
            }
            else
            {
                userSeqStep++;
            }
        }
    }

    if(gameOver == YES)
    {
        NSLog(@"Restarting game...");

        SKNode *lose = [self childNodeWithName:@"loseLabel"];
        [lose removeFromParent];

        SKLabelNode *scoreNode = (SKLabelNode*)[self childNodeWithName:@"scoreLabel"];
        [scoreNode setText:@"0"];

        userTurn = NO;
        sequence = NULL;
        sequence = [NSMutableArray array];
        gameOver = NO;
        [self continueSequence];
    }
}
After the player lifts their finger check to see which MemCircle they were touching. Reset the glowWidth so it doesn’t look pressed anymore and grab the MemCircle’s location bit mask. Next check to see if it is the player’s turn and that the game is not over. If we need to process the player’s turn then we’ll check to see that the player’s current place in the sequence is not further then the end of the sequence. If the user has already finished the sequence we’ll kick out of this function without doing anything. Next compare the location that the player pressed with the location that was generated for that position in the sequence. We are keeping track of where the player is inside of the sequence using the userSeqStep variable. The sequence is just an array that holds randomly generated integers that correspond to a MemCircle location bit mask. So we grab the location bit mask from the spot in the array that matches the player’s current sequence step number. Compare that bit mask to the location bit mask that was pressed by the player. If it matches they got it right! Check to see if they reached the end of the sequence. If they did then let’s update the score and add another step to the sequence. If they haven’t reached the end of the sequence then increment the userSeqStep and wait for them to keep going. If the bit mask of the MemCircle they pressed does not match the bit mask in the current step of the sequence then it is game over. I set gameOver to YES and created an SKLabelNode that tells them they lost and add it to the scene then kick out of the function. If the game is currently over and they touch the screen again we will go into the last if statement at the bottom. This will reset the game, remove the you lost label, and start a new game.
Now lets look at the heart of the artificial intelligence in our game, the continueSequence function.
-(void)continueSequence
{
    userSeqStep = 0;
    userTurn = NO;
    int newSeq = arc4random_uniform(8) + 1;
    NSNumber *newSeqMask = [NSNumber numberWithInt:(1 << newSeq)];

    NSLog(@"Adding sequence mask %@", newSeqMask);

    [sequence addObject:newSeqMask];

    SKAction *wait = [SKAction waitForDuration:2.0];
    [self runAction:wait completion:^(void){
        [self nextInSequence:0];
    }];

}
This function is fairly simple. Since we are adding to the sequence that means that the user’s turn is over. We reset the userSeqStep and the userTurn variables. Next we need to get a new random location to add to the sequence. Our location bit masks are at bit positions from 1 to 9. So we use arc4random_uniform(8) to give us a random number between 0 and 8 and add 1 to it to get our final range of 1 to 9. Next we need to translate that into a bit position, so we shift 1 left by the randomly generated number. Now we can add the new location bit mask to the sequence array. Now we do another wait action for 2 seconds and then run the nextInSequence function.
-(void)nextInSequence:(NSInteger)seqNum
{
if(seqNum < [sequence count])
{
NSNumber *nextNum = [sequence objectAtIndex:seqNum];
int nextSeqMask = [nextNum intValue];
for(SKNode *node in self.children)
{
if([node.name isEqualToString:@"button"])
{
MemCircle *button = (MemCircle*)node;
if((button.positionBitMask & nextSeqMask) != 0)
{
SKAction *grow = [SKAction customActionWithDuration:0.5 actionBlock:^(SKNode *node, CGFloat elapsedTime){
button.glowWidth = button.frame.size.width/4;
}];
SKAction *shrink = [SKAction customActionWithDuration:0.5 actionBlock:^(SKNode *node, CGFloat elapsedTime){
button.glowWidth = 0;
}];
SKAction *growshrink = [SKAction sequence:@[grow, shrink]];
[button runAction:growshrink completion:^(void){
[self nextInSequence:(seqNum + 1)];
}];
}
}
}
}
else
{
userTurn = YES;
}
}
The nextInSequence function will show the user the next MemCircle they need to remember in the sequence. We loop through the children in the scene and find anything that is a “button”. Then we cast it to a MemCircle and check if its location matches the location in the current spot of the sequence. Next we create an action to have the glow of the MemCircle grow for half a second then another action to have the glow shrink back down for half a second. We put these into a sequence and run it against the scene. After the actions are finished we call the nextInSequence function again to show the next MemCircle to remember. If we have reached the end of the sequence the function will make it the player’s turn and wait for their input.
This is now a very simple game!! Let’s go ahead and run it and see how it works.
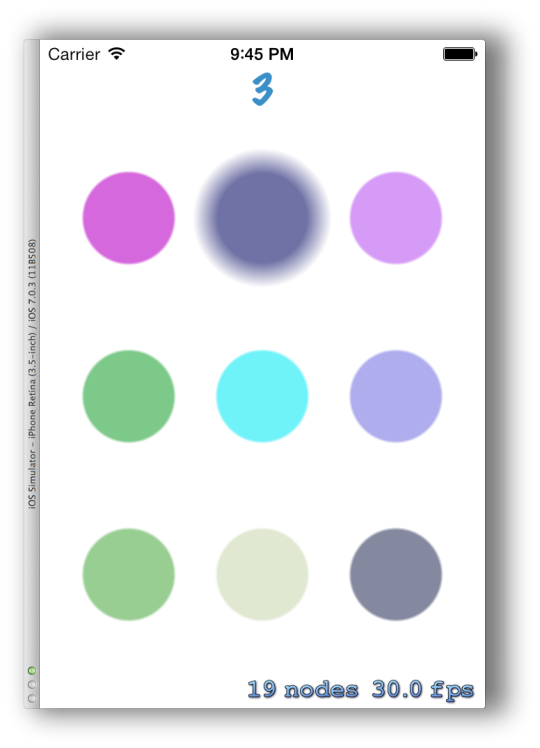
This is a very simple rudimentary game at this point. You could add some labels that count down before it starts showing the user the sequence. Then maybe another one to let the user know it is their turn. Add a better scoring system that rewards players that can remember the sequence quicker. It could also use a menu system and a high score storage system, but these things are beyond the scope of the tutorial. The SpriteKit game framework seems to be very easy to work with. I like how easy it is to integrate UIKit object into it. It is also an official game engine supported by Apple, which is always a plus. The main issue with using it is that you will be locked into iOS and iOS 7 and above at that. You can find the full source code on GitHub. I hope you enjoyed the tutorial.